Arm Knit Cowl
We’ve been getting a lot of questions about using our merino top for arm knitting, so this weekend I decided to do some playing and figure out a little more about it. I made this Arm Knit Cowl from Taupe Merino Top. It took just under 1 pound of fiber. I cast on 4 stitches, knit until it was the right length, then joined it with one twist. This makes a mobius-style, so it lays better around the neck.

I learned a few things about working with roving for arm knitting during this process, so as well as the pattern I’ll share how I “spun” the roving, cast on and joined yarn. What follows are step-by-step directions on how to arm knit your own cowl from wool roving.
Adding Twist for Stability
First off, I felt that putting a little twist in the roving would make the cowl more durable. I achieved a light twist by taking my ball of roving, and winding it into another ball. Every time you wind roving into a ball, it adds a slight amount of twist. So, I repeated this rewinding several times. Doing this 6 times seemed just about right. The twist adds a little more dimension and stability to the yarn.
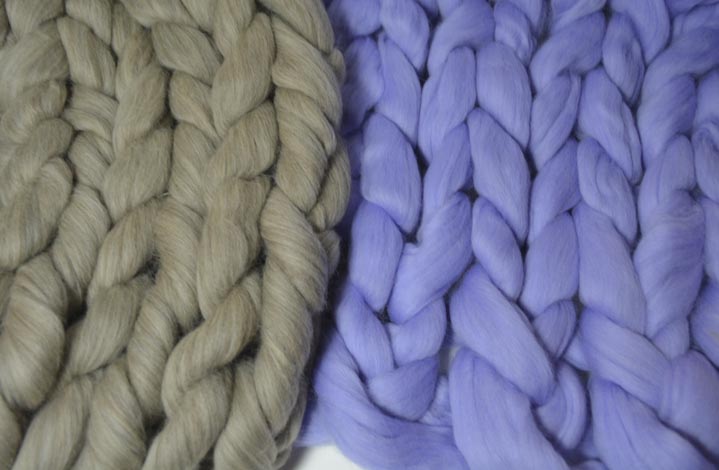
Here you can see the difference between knitting with spun roving (taupe) and knitting with unspun roving (periwinkle).
Cowl versus Blanket
The cowl took less then a pound of roving, but if you were to make a blanket you would need more then one ball, and need to do a join. Each pound of fiber makes about 480 square inches of knitting, so for a 4 foot by 5 foot throw you would need about 6 pounds.
Casting On
To cast on I use a simple “cursive e.” Just make a loop of yarn, making sure the tail crosses.
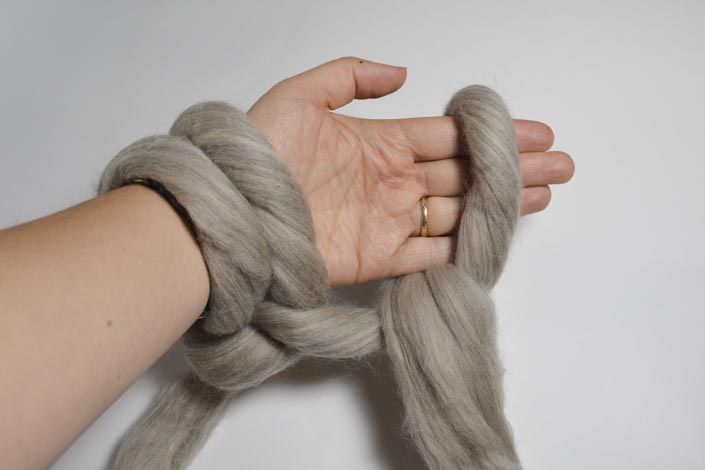
Make a backwards loop…
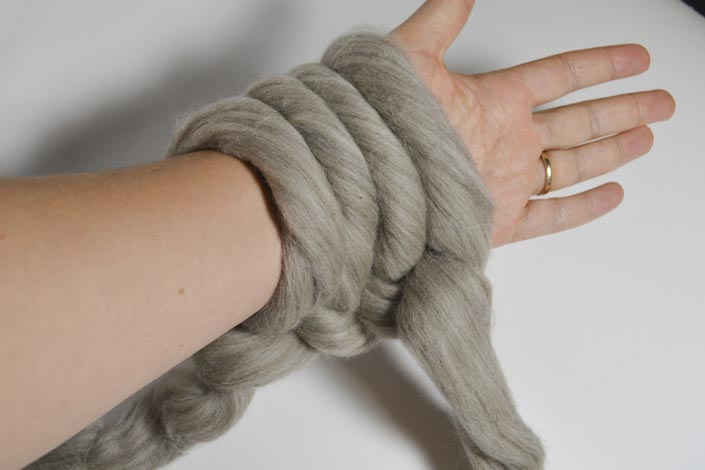
…and slip it onto your arm.
Joining On More Fiber
To do a join I split a foot of my yarn tail in half and remove one half of the split. I do the same with the end of the new ball of yarn. Then I lay the two half-ends side by side and lightly twist to hold them together. After a join, I carefully knit the next 2 or 3 stitches, watching to make sure the join doesn’t pull apart before it has the stability of the stitches to hold it together.
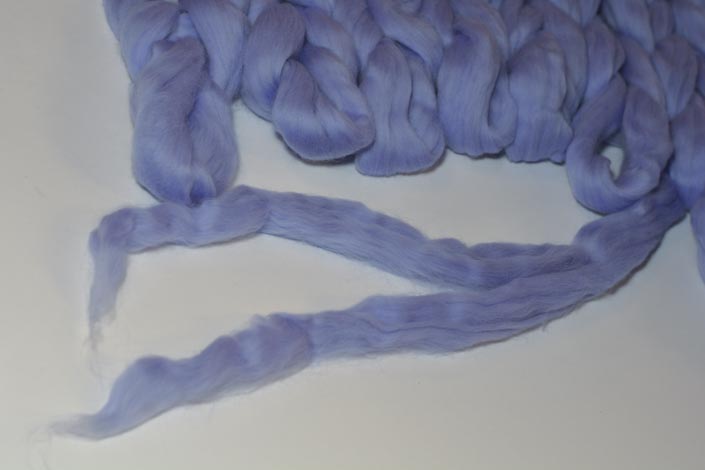
Split the end of the roving, both the current piece, and the new piece to be joined on…
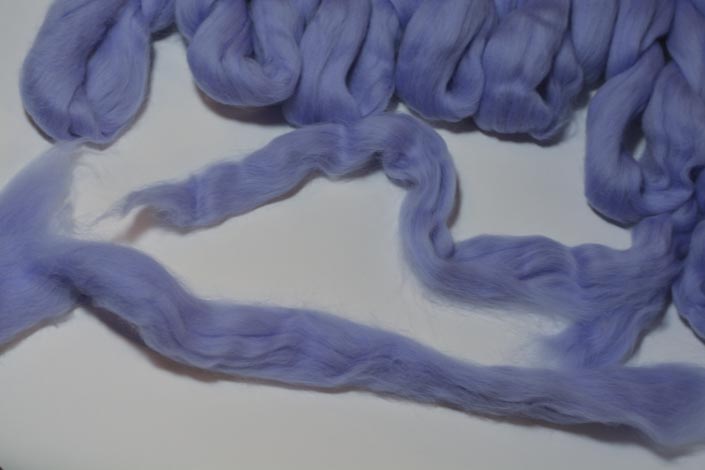
…break off one half of the split; repeat with the new piece to be joined, and overlap the two ends (old and new)…
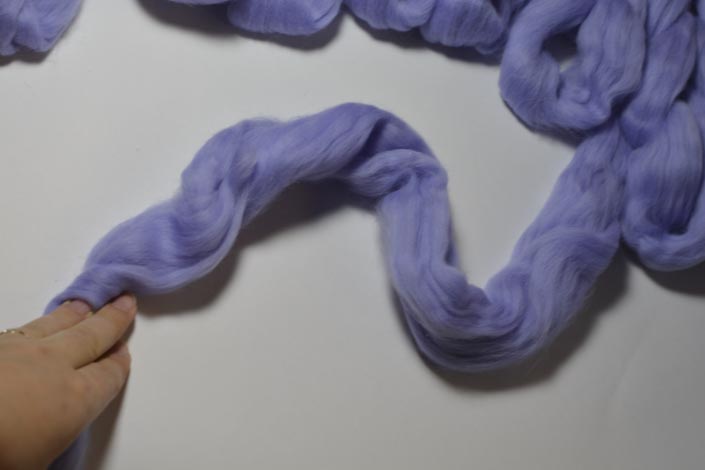
…and finish by twisting the join, to give added strength.
Watch for Twisted Stitches
Another thing to watch for is twisted stitches. You want each stitch to look like a loop. When you pull a new loop through, just make sure the stitch on your arm is not twisted.
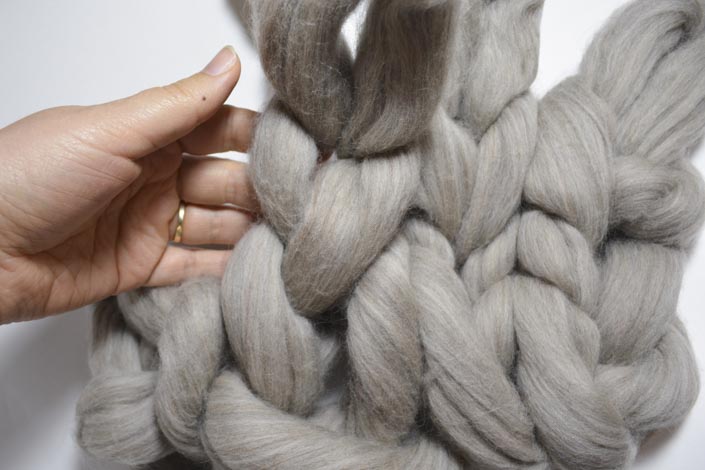
This is what a twisted stitch looks like.

Two non-twisted stitches with a twisted stitch in between (look at the row just below the live loops).
Knit Cowl Pattern:
Cast on 4 stitches (see above for how to cast on) on your left arm.
Being careful not to twist the stitches (see above for more on this), knit 4 across, by pulling a loop of yarn through the loops on your left arm, and transferring the new loops to your right arm. Keep your loops comfortably snug on your hand, then transfer back to your wrist.
When you reach the end of the row, use your left hand pull up a loop of yarn through the loop on your right hand, and transfer to your left wrist. Do this across the row.
Continue these 2 knitting rows until your cowl is the desired length. Put it around your neck to get a good feel for how long you want it. I made mine 19 rows (about 45″) long. How many rows it takes to get to 45″ will vary though, on the gauge of your knitting. So, it is better to measure, than to rely on row count.
To join the two ends to create the cowl shape, I laid out the cowl with a fold, so that one end was right side up, one end was wrong side up. I laid the two ends butted up to each other. I then used the tail end of roving to sew the two ends together. Make sure to sew through each unfinished loop, so it won’t unravel. Sewing it with one side right-side-up and one wrong-side-up puts half a twist in the cowl. When you wear it, that join will lay flat at your neck, and allow the cowl to be right side up all around.
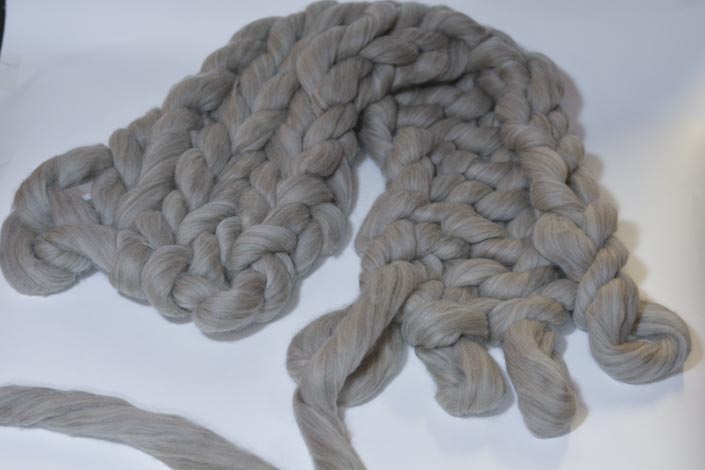
Lay out with a fold – one side right-side up, and one side wrong-side up
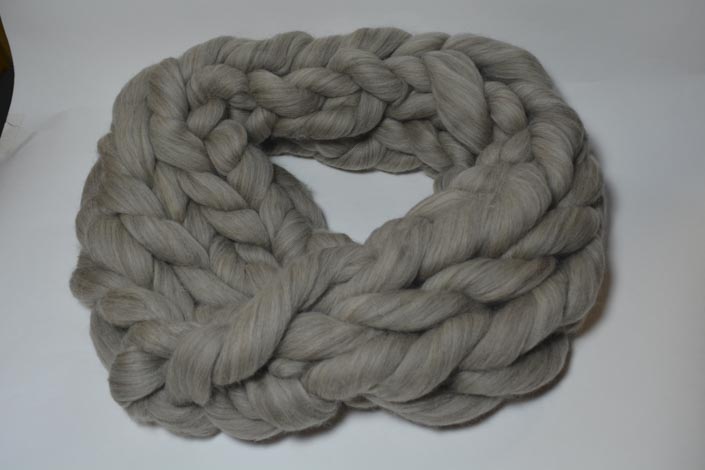
After sewing up the seam, the cowl will lay nicely around your neck, showing the right side of the stitches all the way around.
To finish off the ends, I just tied my two ends together and wove them back into the cowl along the join area (as it is mostly hidden when you are wearing the cowl). With such big yarn there is no perfect way to hide the ends.
My First Arm Knit Cowl
There you have it, folks – an arm knit cowl!
I didn’t have anyone to take pictures for me, so I did it all with a remote trigger. There were a lot of out-takes of me that still showed the cowl well. So, here goes…


Have you tried arm knitting? Have you knitted with roving? Please tell me about your experiences in the comments below.


Super clearly and intelligently written and explained. I just made my first giant cowl thanks to you. Thanks!
Wonderful! Thanks for sharing!