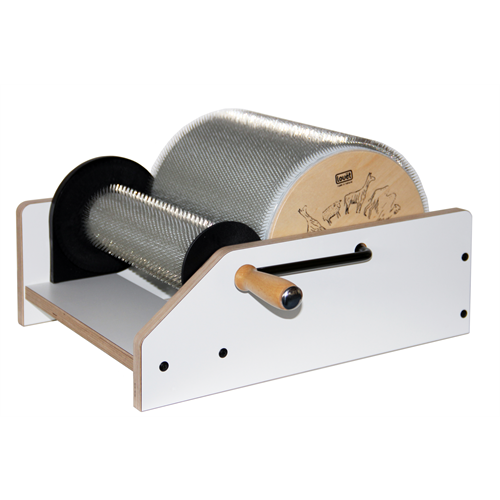
There's no place like home...there's no place like... Mielke's Fiber Arts, LLC
Your Central Wisconsin source for weaving, spinning, knitting, crocheting, tatting, bobbin lace, felting, dyeing, and locker hooking equipment, books, and supplies.


Home

Useful_Information    

Site Map

What's New? 

Ordering Info

PRODUCTS
Bobbin Lacing
Books

Braiding
Crocheting
Dyeing

Felting

Fibers

Gift Certificates

Knitting
Kumihimo
Locker Hooking

Naalbinding
Netting
Rugmaking
Silk Fusion
Sale and Clearance
Spinning
Tatting
Weaving
Yarns

Shipping

Classes 

Contact Us

Directions

About Us

Calendar of Events  

FAQS

Links

Free Patterns 

Web Rings

Search

Find us on Facebook!

Handcarding Instructions

The purpose of carding fiber is to open the fibers and get them in a manageable bundle so they can easily be drafted when spinning.

This is only one of many ways to hand card (I mention another method at the end of this article).  If this method just does not work for you, don’t become discouraged.  Just experiment and observe how other spinners card to find what works for you.  The main thing to remember is that the object of carding and the carding motions is to open the fibers; and to do a good job, the fiber has to be flipped or transferred from card to card until all the fiber has been thoroughly opened.

We will name the cards Bottom Card and Top Card.  This position is more important than whether the card is in the right hand or left hand, though I will say that most right-handed people hold the top card in their right hand.


To start, "charge" the Bottom Card with fiber.  To do this, brush a handful of the fiber against the teeth of the card, so the fiber catches on the teeth of the handcard.  You need to brush the fiber against the card starting from the handle end and then downward.  Don’t put too much fiber on the card at one time.  Too much fiber at once makes the job slower, not faster.


1. Now, take the Bottom Card in one hand, holding it so your fingers are facing upward, and your pinky finger is nearest the body of the handcard.  Brace the bottom hand against your knee for support.  Take the Top Card in the other hand holding it like a tennis racket.  Sometimes it helps to place the forefinger on the back of the body of the handcard, to give more control.  With the Top Card, begin to brush towards yourself, overlapping the cards a little at a time.  Starting at the bottom edge of the Bottom Card, over lap it with about an inch of the top card.  Do not mesh the teeth; just brush the fiber.  Now, repeat the motion, overlapping the two cards a little more.  Continue until the cards are completely overlapping each time. T he carding motion is kind of like a gentle sweeping arc.


2. When the fiber is distributed evenly on both cards, it is time to transfer the fiber from one card to the other.  First, rotate the Bottom Card 180 degrees.  The bottom hand will now hold the handle of this card in the same way your bottom hand would hold a broom while sweeping, but with the card still braced against your knee.


TOP VIEW SIDE VIEW

3. Now bring the top card down across the bottom card in a wiping motion.  This transfers the fiber from the Bottom Card to the Top Card.


  TOP VIEW SIDE VIEW

4. Repeat the wiping motion, but this time wipe away from you, transferring the fiber to the Bottom Card.

Repeat steps 1-4 again as many times as necessary.  I usually do it two or three times.

Now to make the fiber into a rolag, the little bundle of fiber that you will spin.  Transfer all the fiber to the Top Card, as you did in step three.  Brush it quickly once or twice against the Bottom Card, as in step two, to smooth all the fiber on the Top Card (sometimes it is necessary to repeat step three after doing this).

Position the cards like this.  Begin to catch the fiber on the Top Card on the teeth of the Bottom Card, and make about a 1" fringe of fiber that is pushed off the Top Card.


Back the Top Card up again, so the fringe of fiber is at the edge of the Bottom Card.


Now begin to wipe the Top Card on the Bottom Card, leaving a "V" for the rolag to form in as the fiber rolls up.


You are now the proud owner of a hand-carded rolag.

Practice makes perfect.


Some people like to work with wool that is still in the grease, or only washed in cold water, so that all the lanolin is still in it.  This is too much lanolin in my opinion, so I wash my wool in hot water and use lots of soap (ask for directions if you want to wash your wool this way).  I have never had a problem carding wool washed in hot water with soap, but occasionally you may find a wool that is too static-y or just seems to be difficult to card, as though it is grabbing the cards, rather than sliding (of course, wool with too much lanolin has the same symptom, only in that case, the lanolin has become tacky from age, and is sticking to the card).  If you think your wool is lacking moisture or lanolin, you can "lubricate" it.  Mix a little olive oil or hair conditioner in water and place the mixture in a spray bottle.  Spray a little on the wool, and let it sit in a warm place, in the sun, for example, for a while before you card it.  Only spray as much wool as you are going to work with at one sitting, and I recommend spinning it within a short time, as well, while the "lubrication" is still at it’s peak.


If you simply cannot master the carding motions I walked you through earlier, here is another way to card. It often seems easier when you are learning, but I find the extra motions slow me down.  I find the first method more efficient.  But I’ll let you choose.

Here is the "Primitive" carding method.


1. "Charge" the bottom card with fiber.  Brush a handful of the fiber against the teeth of the card, so they catch.  You need to brush the fiber against the card starting from the handle end and then downward.  Don’t put too much fiber on the card at one time.  Too much fiber at once makes the job slower, not faster.


2.  Card the fiber, brushing it with the top card.  Start by overlapping the cards only an inch, and increase the overlap each time until the cards are completely overlapping each time.  The carding motion is kind of like a gentle sweeping arc.  Do not mesh the teeth of the cards.  That only makes more exercise for you, it doesn’t card the fiber any better.  Remember to brace your bottom hand on your knee for support as you card.


3.  When the cards have equal amounts of fiber on them, peel the little batts of fiber off each one, leaving them in one piece, and lay both of them on the bottom card again.  Sometimes it is helpful to gently push the batts into the teeth.


Repeat steps two and three until the fiber is open and thoroughly carded.


Now repeat step two once more, then, beginning at one long edge of the handcard, roll the fiber into a neat roll, kind of like rolling up a jelly roll.


A rolag!  Let’s start spinning.

© 2000 Andrea Mielke

Mielke’s Fiber Arts, LLC  2550 Co. Rd. II, Rudolph, WI 54475-9409  (715) 435-4494  www.mielkesfiberarts.com


Back to Useful Information page

Back to Handcards Page

Top


[Home] [Useful Information] [Site Map] [What's New] [Order] [Shipping] [Classes] [Contact Us]
[About Us] [Calendar of Events] [FAQS] [Links] [Free Patterns] [Web Rings]
[Search] [Bulletin Board]

prices subject to change without notice, due to manufacturer's price changes

Privacy Policy

Mielke's Fiber Arts, LLC  3086 County Road PP  Rudolph, WI 54475-9406
(715) 435-4494


Copyright © 2001-2010 Mielke's Fiber Arts, LLC
Last modified: August 11, 2010